Quality assessment of 3D printed metal


Challenge
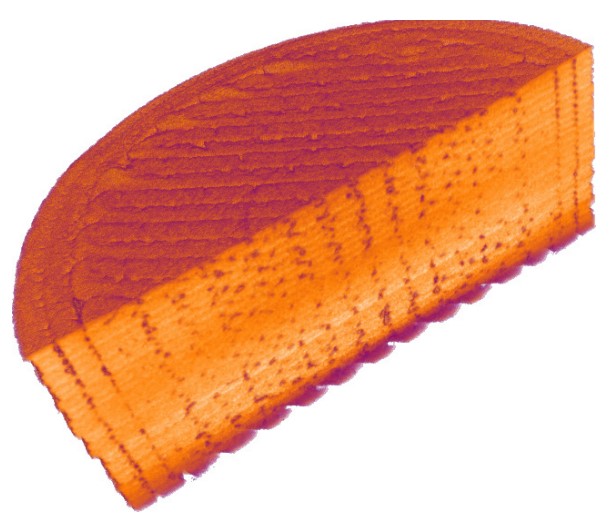
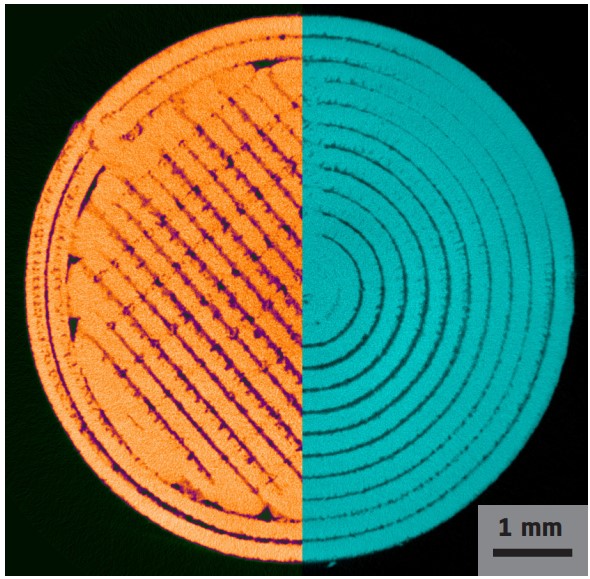
Printing speed and temperature, layer thickness, and printing pattern can all have an impact on the overall quality of the print. While the surface can easily be inspected visually, X-ray CT helps to study the inside of a printed sample non-destructively. The 3D image obtained from CT can be cut virtually at any position, which can be used to find defects. In this project, the quality of differently produced prints was investigated by X-ray micro CT, both visually and by determination of the porosity of the individual prints.
Collaboration
Through the collaboration between ScanTronic and the 3D Imaging Centre at DTU, 3D printed metal samples were investigated using CT and analysed for their internal structure. This collaboration was part of the LINX project in which researchers at leading Danish universities collaborate with scientists in industry to solve industry relevant problems using advanced neutron and X-ray techniques.
Results
ScanTronic produced various cylindrically shaped 3D printed steel samples of 3 mm in height and 7.5 mm in diameter. The samples with either rectilinear or concentric printing patterns were manufactured at different temperatures and speeds. X-ray micro CT was performed for each of the samples such that 3D images with a voxel size of approx. 10 µm3 were obtained. The internal structure is well resolved and shows pore space between the print layers, which slightly increases at higher printing speeds. The different patterns, rectilinear and concentric, cause different porosity distributions which in the case of mechanical loading would lead to different responses of the printed product. However, the differences in porosity between the differently produced samples are small, indicating that the range for varying the printing properties needs to be increased in order to affect the print quality more significant.
Perspectives
The analysis of the CT data has shown how different parameters affect the print quality. With the information gained in this project, ScanTronic can continue to optimise their products
